The church biscuit; a Sunday quest: 20. Fresh strawberry and almond brownies & 21. Apple and almond blondies

Dark chocolate and strawberry brownies

Dark chocolate and strawberry brownies

21 July: Fresh strawberry and almond brownie
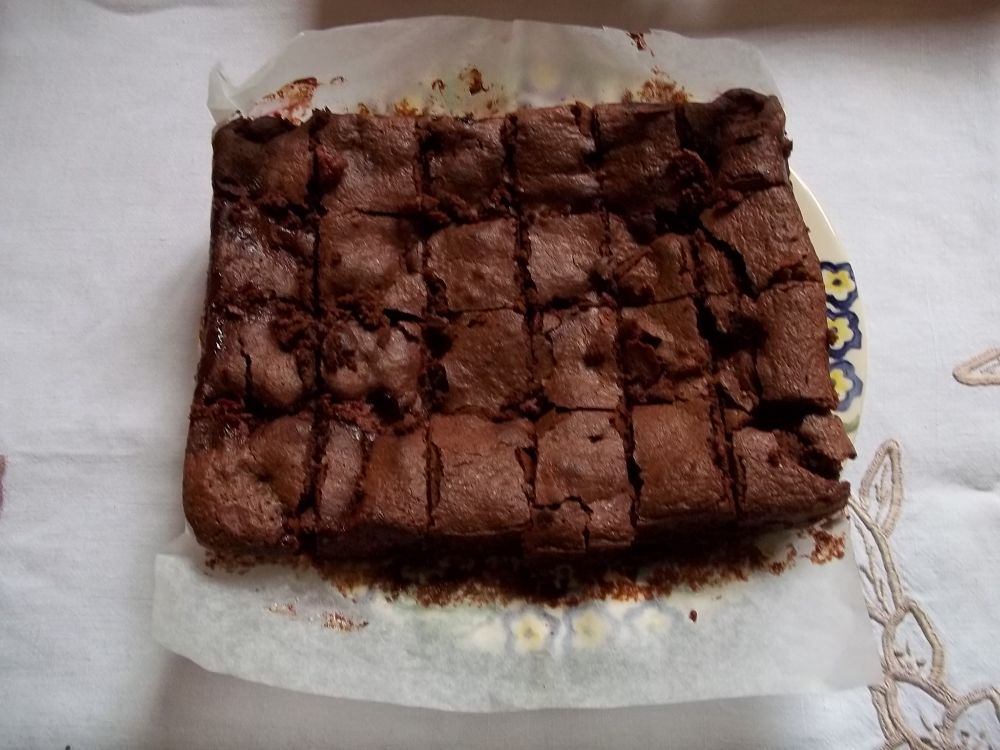
I made these brownies for church on Sunday 21 July and I shall not be giving the recipe as I got a bit carried away with too many strawberries which led to sweet soggy collapsing mess. (There is a hint of this in the photograph.) We ended up having to eat from the communal plate with spoons – not the most elegant of  a sweet and sustaining something with coffee after church. It was however a delicious mess which the empty plate I took home bore witness too. (Thank goodness for a plentiful supply of coffee spoons.) Made with wholemeal flour, ground almonds and dark chocolate with 70 %  cocoa, I added an overabundance of strawberries (200g) which not only contain a lot of water in themselves but were washed too enthusiastically and  insufficiently patted dry. The stalwart connoisseur tasters declared it would be an excellent pudding. So back to the drawing board to prefect a strawberry brownie. (I notice from my post of 11 July when I made Strawberry and almond blondies that I had used just 100 grams of strawberries!)

Apple and almond blondie

Apple and almond blondie

28 July: Apple and almond blondies

Ingredients

115g/ 4 oz butter + a little more for greasing

225g/8 oz soft light brown sugar

2 eggs lightly beaten

140 g/ 5 oz wholemeal self raising flour

85g/3oz ground almonds

2 dessert apples chopped into small chunks

Preheat oven to 180 degrees C/ 160 degrees C for a fan oven/ 350 degrees F/Gas Mark 4

Grease and line a shallow tin (mine is  7.5inches by 9.5 inches-/c.20 by 25 cm  but a 7 inch/18 cm or 8 inch/20 cm square tins would do as well) with baking parchment. If you cut the paper so that two sides stand higher than the tin, this makes removal of the cooked cake from the tin very easy.

Put butter and sugar in a saucepan over a gentle heat and stir until sugar has dissolved but don’t let the mixture boil (a bit of bubbling is ok). Let this cool for about 10 minutes.

Now add the lightly beaten eggs to the mixture and follow this with the sifted flour and ground almonds. Lightly toss in the chopped apple. 

Pour the mixture into the prepared tin, making sure that  the apple pieces are well distributed and the mixture is of an even depth.

Bake in the prepared oven for 20-25 minutes until a skewer in the middle of the cake comes out clean. Leave it in the tin for a few minutes and then, holding the baking parchment, remove the cake from the tin. (I often leave the cake in the tin until I get it to church.) Cut up and serve.

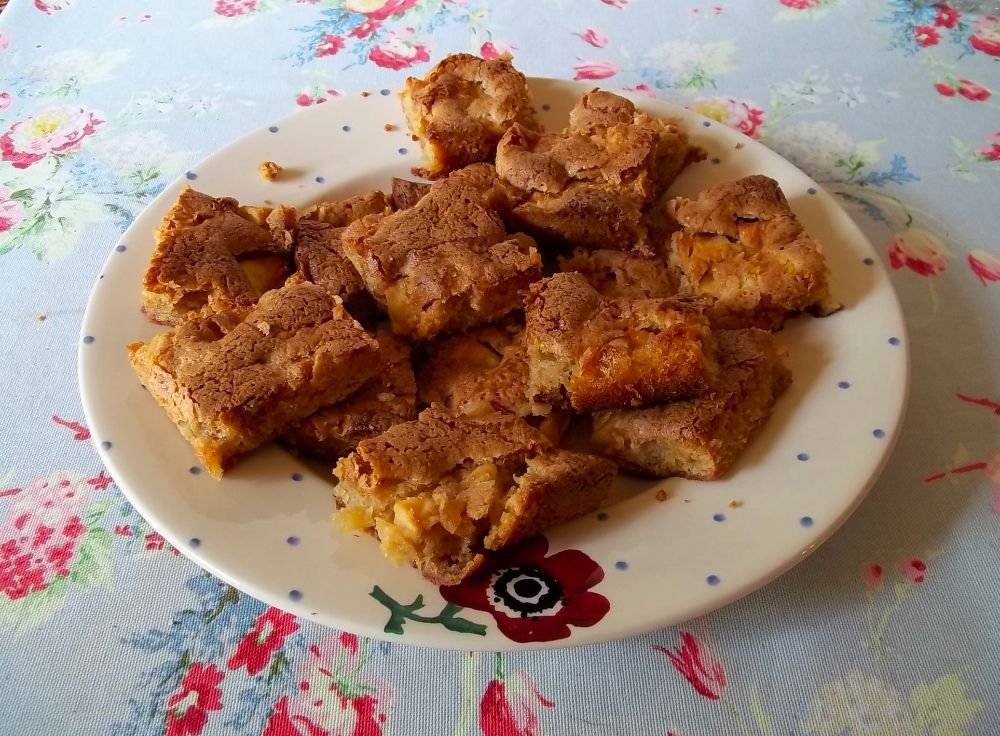
A light, moist cake, this went down well with coffee on a warm summer morning. I made it again in the week and have to say that it’s just as good with afternoon tea or for pudding.

Posted in Uncategorized | 2 Responses

Patchwork altar frontal: a village project. Fourth meeting

Patchwork altar frontal: hexagons as linking patches?

Patchwork altar frontal: hexagons as linking patches?


Patchwork altar frontal: diamonds as linking patches?

Patchwork altar frontal: diamonds as linking patches?

The last meeting of the sewing bee was at the end of June – now almost a month ago – but there has been so much happening or needing attention that I never got round to blogging about it. This time 6 of us met at Hailey Compton and we were able to enjoy what we now realise was the beginning of a glorious month of good old fashioned summer weather. We spent an jolly couple of hours drinking tea and sewing in the sun flooded conservatory with the doors wide open and the air warm and still. Looking up while chatting and stitching, eyes – overdosed on too much grey weather of the first part of summer – felt rejuvenated as they soaked up the welcome sight of a green and luscious garden beyond which the sunbathing corn almost (well, very almost) grew before our eyes.

At this meeting, we decided to opt for diamonds to link the stars (how poetic) rather than hexagons (see above photos for comparison). We agreed that I would push on with this so that we would have something more substantial on view for the Art & Craft Exhibition to be put on during the last weekend in July (in fact, it is on now as I write and I shall spend most of the weekend in church, armed with more papers and patches to cut up while visitors wander round and enjoy what we have on display.)

Patchwork altar frontal: work in progress on central medallion

Patchwork altar frontal: work in progress on central medallion

As well as advancing the main body of the frontal, I have been working on the central medallion, transferring shapes worked out with compass and protractor from paper to fabric – not quite as easy as I had thought it would be as shapes cut with even minute inaccuracy would throw everything else out of kilter. Eventually, I achieved a satisfactory, though far from perfect cross with underling star  and linking circle. The background stumped me for a while until I hit upon the idea of having a simple patchwork of light-coloured squares rather than a background of just one colour. I liked the way the different patterns of fabrics drew the eye in to explore the random squiggles and little flowers and in general made the area of more interest. I hope the others in the group will like it too. It is difficult to consult on everything and almost impossible not to forge ahead when I think I’ve solved a design problem that has been niggling away in between doing other things.

Patchwork altar frontal: component parts brought together

Patchwork altar frontal: component parts brought together

My next move was to cut out the curlicues surrounding the medallion. The first one I secured to the background using Bondaweb and I then appliquéd this with satin stitch to give the shape more definition and texture. In one way the yellow double curl seems intrusive on the patched cream squares with their subtle patterning, but I think the yellow will in the end work well to link with the main body of the rest of the frontal. (Well, I hope it will. At this stage you never really know. If in the end it all looks too much, too fussy and distracting, then I’ll ditch that idea – and piece of fabric – and make another background of simple patched squares). The picture above shows what the altar frontal looks like for this weekend’s Art & Craft Exhibition. 

Our next meeting is scheduled for  21 September. During the intervening time I’ll gather together packs for star making so if anyone wants to take some away to do at home, they will be able to.  Once the Art and Craft Exhibition is over, I shall continue to work my way through the appliquéd curlicues at a more leisurely pace. 

Posted in Uncategorized | 1 Response
  • June 2025
    M T W T F S S
    « Jul    
     1
    2345678
    9101112131415
    16171819202122
    23242526272829
    30  
  • Photographs & Media

    Please attribute any re-uploaded images to Addison Embroidery at the Vicarage or Mary Addison and link back to this website. And please do not hot-link images!