Patchwork altar frontal: a village project. Third meeting

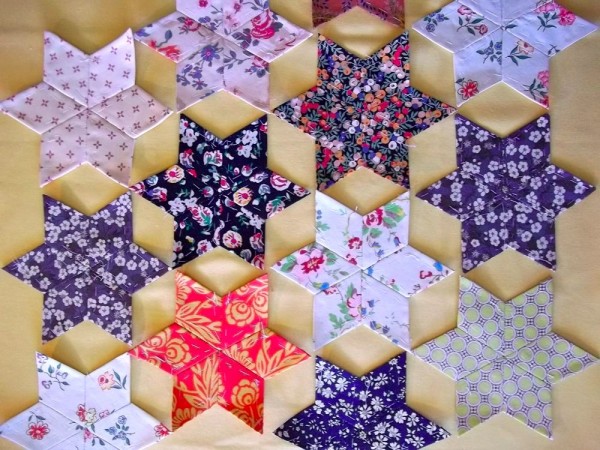
Altar frontal: 6 point patchwork stars in temporary lay out

Altar frontal: 6 point patchwork stars in temporary lay out

Saturday 1 June: Third Meeting

For this meeting I thought we would begin by making some six point stars which will make up much of the altar cover. A star like this has the merit of being an easy unit for individual people to work on at their own pace. In addition each star can be completed quite quickly which is encouraging in itself. When a few are laid out as above  there is a real sense of progress and this is further encouraging.

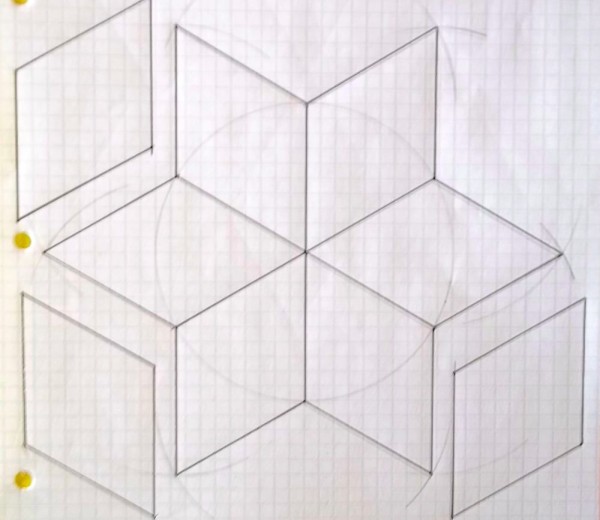
I used to have an aluminium template for patchwork diamonds but, as ever, it is the one thing I couldn’t put my hand on when I needed it. So, it was back to square one with graph paper, compass and protractor – the construction lines can just about be seen in the photograph below.

Construction of diamond patchwork template using compass and protractor

Construction of diamond patchwork template using compass and protractor

Draw a circle of chosen radius – in this case 5 cm. Mark the diameter and put the protractor along this. Mark out angles of 60 degrees in the top semicircle and then do the same for the lower semicircle. Now link opposite points on the circle so that you now have drawn in three diagonals. Put the compass point on each of the points where the diagonal touches the circumference and, still with your compass at 5 cm, draw two arcs, one to each side of the point where the compass is anchored. When this has been done this for each of the points on the circumference, six sets of crossed arcs will be visible. These each form the apex of a diamond which is clearly visible when lines are drawn linking these points to the six points on the circumference. I added additional diamonds and then photocopied this sheet – just 20 times to begin with; more can easily be done later.

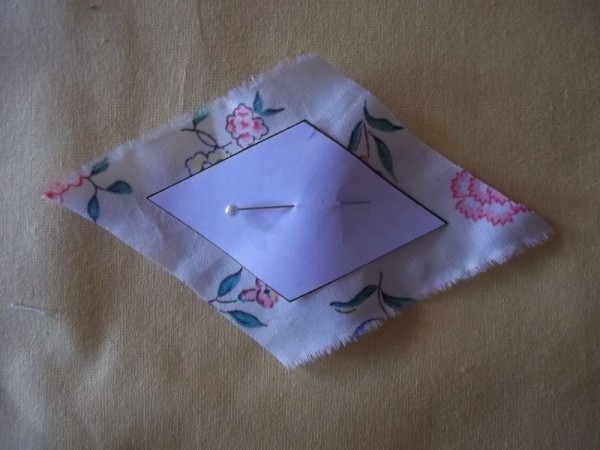
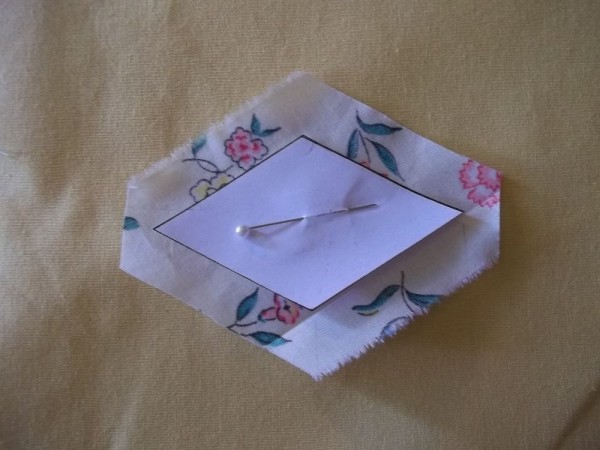
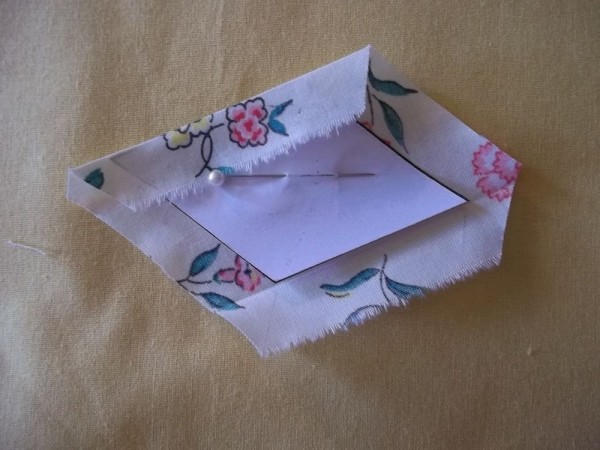
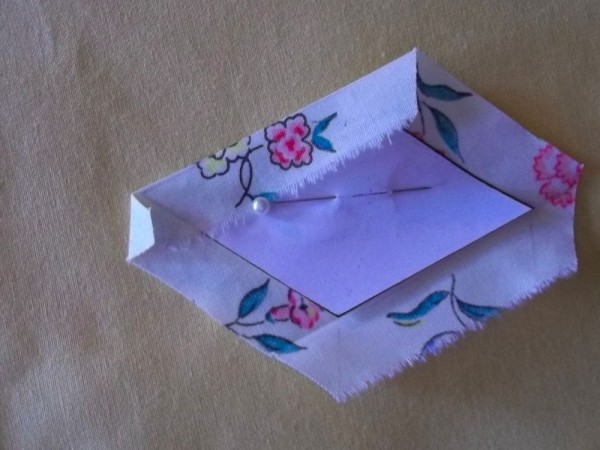
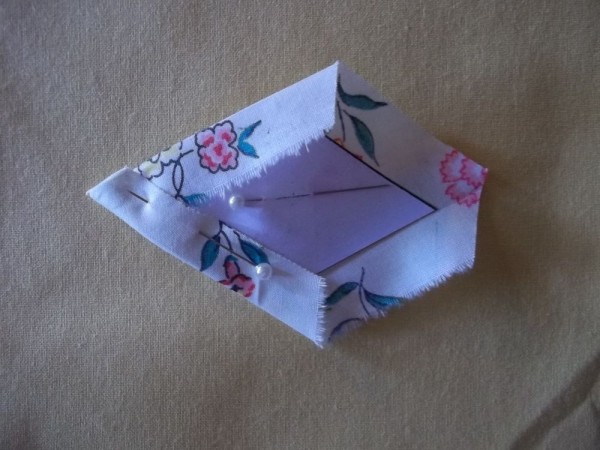
The following photos show stages in the folding of fabric over the paper and the only reason I have bothered to show this is that the quilt will have a smoother finish if the acute angle of the diamond has the fabric folded neatly in the manner described. It’ s not essential to do it this way but in the long run it is neater.

1. Diamond paper and cut fabric.

100_3785

2. Trim points off fabric.

100_3786


3. Fold over long side of fabric.

100_3787


4. Fold tip of fabric over so that the outer edge of the fold above the left point is now lying along the lower edge of the diamond.

100_3788


5. Now fold the next side as above. (Pinned above so that it is clear how it has been done but, when sewing, pinning is not necessary.)
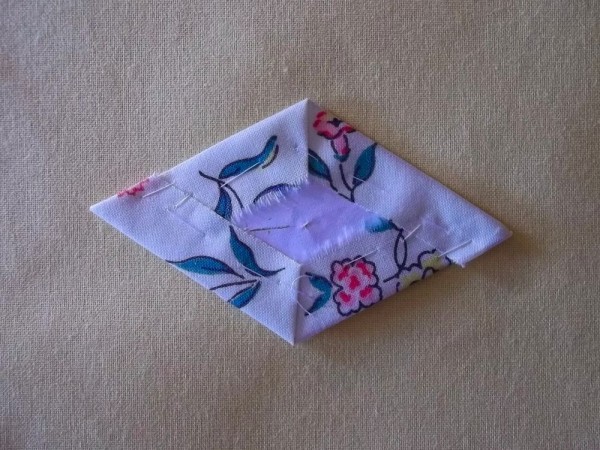
100_37906. Folded and tacked piece – note it may be useful to take additional stitches to secure the point.

100_3791

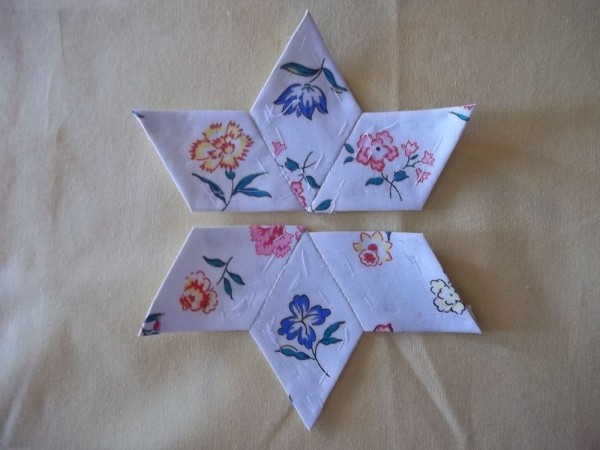
7. Slip stitch 3 diamonds together. Don’t worry if the straight line is  not perfect, the great thing about fabric is that it will give and stretch to accommodate the unevenness.
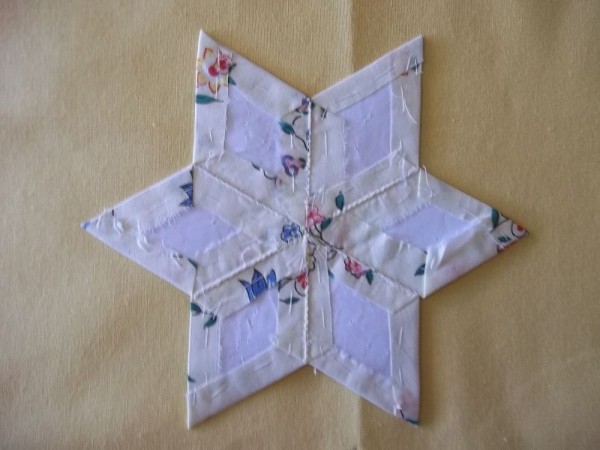
100_37798. Slip stitch the two sets of three diamond together to form the star.

9. Make more stars.

There are now about 12 stars completed and more were taken to be finished at home. The yellow will be used to make diamonds to link the stars but at present  the stars have just been placed on the yellow to give an idea of whether the colours will work together. 


Posted in Uncategorized | Leave a comment

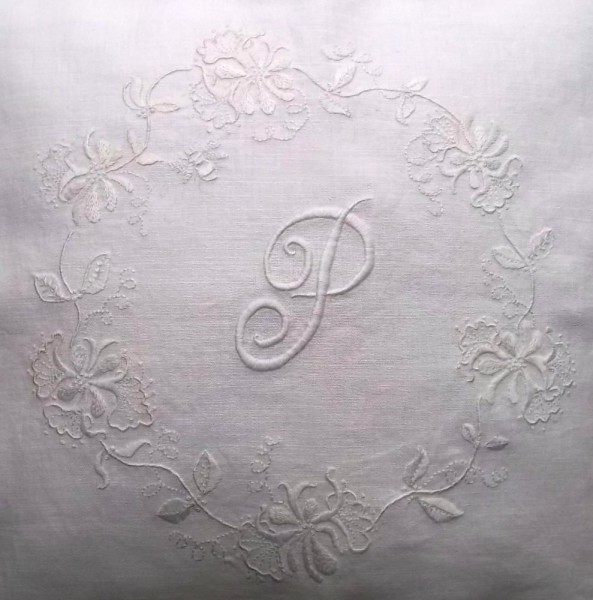
Whitework honeysuckle cushion

Whitework honeysuckle cushion: hand embroidered in embroidery cotton on pure linen

Whitework honeysuckle cushion: hand embroidered in embroidery cotton on pure linen

Photographs of this cushion have been very difficult because of very overcast conditions during the day at the weekends, which is the only time I can take photographs at the moment. The sun disappeared behind a cloud half way  through taking photos of the details and the linen went from looking bleached out to dirty grey before you could say ‘Jack Robinson’, though why one might be saying that completely defeats me now I come to think about it.

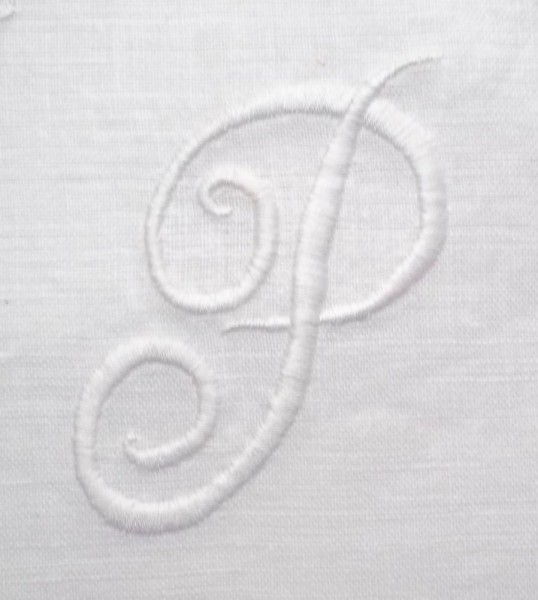
Monogram 'P': detail from honeysuckle embroidered whitework cushion cover (embroidery cotton on linen).

Monogram ‘P’: detail from honeysuckle embroidered whitework cushion cover (embroidery cotton on linen).

Made for a work colleague when she left to work in Italy I finished the embroidery a few weeks ago but have not yet managed to make it up into a cushion. I now have a deadline of mid June when she will be visiting Oxford, so that should concentrate the mind and fingers appropriately. It will be the first thing I do when I revert to having Thursdays and Fridays off once more.

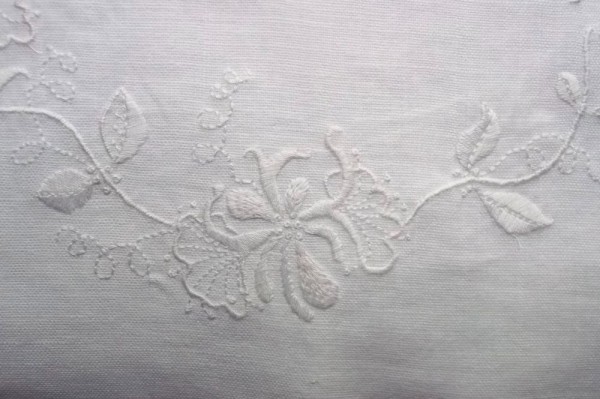
Whitework:  detail of hand embroidered  honeysuckle cushion

Whitework: detail of hand embroidered honeysuckle cushion

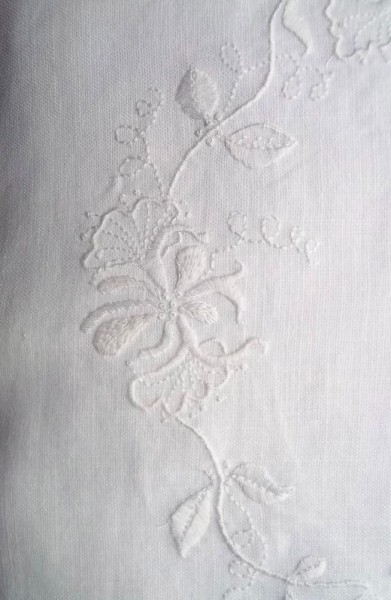
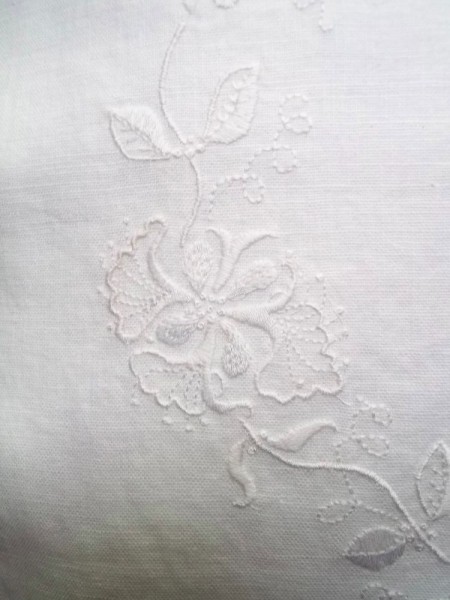
Previous blog posts  show how much I love embroidering honeysuckle, both flowers and stems with their springy tendrils. I usually reach for multiple shades of pinks, reds, yellows through to apricots, peaches and any other mellow colours of ripe fruit but P is for Paris who said she would like a whitework cushion. Curiously, I found that I embroidered white honeysuckle quite differently from how I would have done if I used colours. Normally I would do the frilly trumpet-like parts of the flower in a simple stem stitch but I felt with no contrast of colour I wanted to contrast texture, so I used lots more narrow satin stitch which gave the edge a clearer definition. I am addicted to satin stitch anyway and found the smooth sleek sheen very satisfactory on some of the other bits of the flowers.

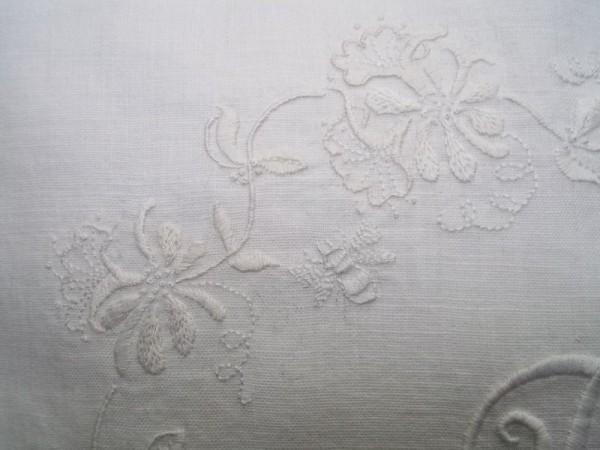
Whitework honeysuckle embroidered cushion: detail of hand embroidery with honeybee

Whitework honeysuckle embroidered cushion: detail of hand embroidery with honeybee

I’ve never embroidered a bee before and have yet to perfect its fore legs and antennae – I hope not everyone will think it has a toasting fork sticking out of the top of its head.

Whitework embroidered honeysuckle cushion: detail of hand embroidery

Whitework embroidered honeysuckle cushion: detail of hand embroidery


Whitework honeysuckle embroidered cushion: detail of hand embroidery

Whitework honeysuckle embroidered cushion: detail of hand embroidery

I hope to be able to photograph this design  when I have finished it and before I have to give it away as I feel I haven’t presented it at its best, so I’m hoping June will bring a bit of sunshine and not too much wind.


Posted in Uncategorized | 1 Response
  • June 2025
    M T W T F S S
    « Jul    
     1
    2345678
    9101112131415
    16171819202122
    23242526272829
    30  
  • Photographs & Media

    Please attribute any re-uploaded images to Addison Embroidery at the Vicarage or Mary Addison and link back to this website. And please do not hot-link images!