Playing around with patchwork squares as preparation for making an altar frontal (Fig. 1)
The idea for this project goes back to over a year ago when one of our parishioners visited York Minster and was overwhelmed by the beauty of one of the Minster’s altar frontals – an astounding work of patchwork and appliqué, full skirted in the Laudian style. She came back giddy with enthusiasm and determined that we should have a try at doing something similar. Now, the population of York is 205,000 (see Guardian article of 10 Feb 2013) and that of Ipsden (including surrounding hamletinas – they’re too small to be even called hamlets) is under 300. But we are nothing if not a creative, have-a-go sort of people and although it has to be admitted the talent is weighted towards the arts of acting, writing and music making, the skills of flower arranging and costume making show there is definitely facility with the needle and great colour consciousness there to be tapped – and tap it we shall.
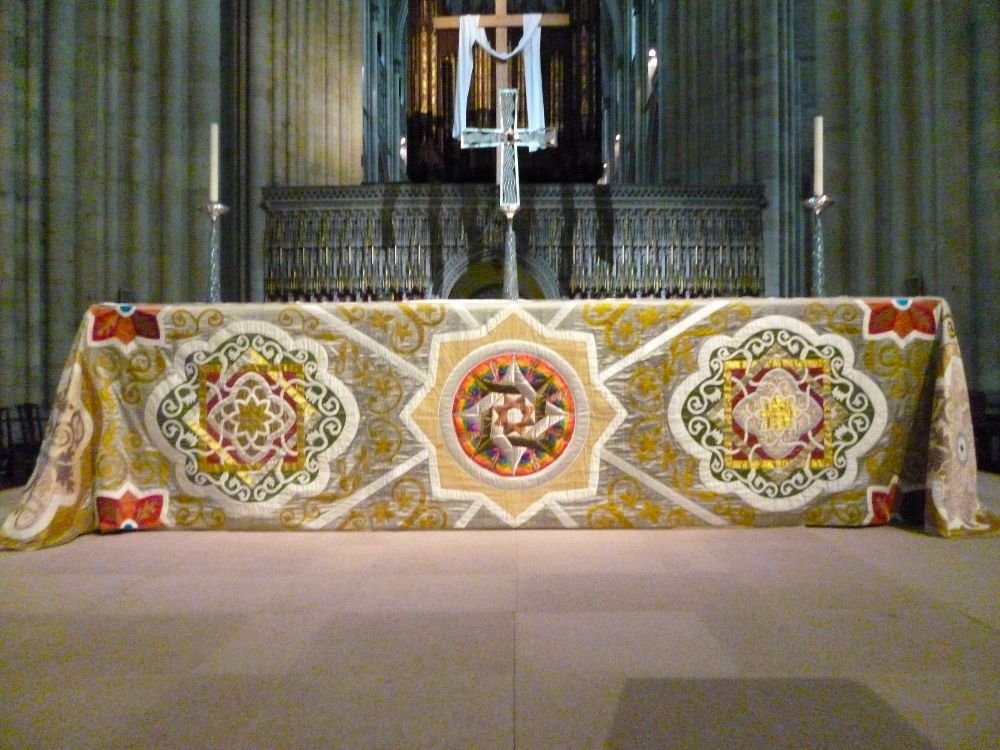
York Minster: stunning altar frontal by the Minster Broderers. Photograph kindly supplied by Jennifer Solomon (Fig. 2)
When I visited York Minster there was another altar frontal in place. This was also gold,silver and ivory but heavily embroidered in gold thread but with not a hint of patchwork – again breathtakingly lovely, though rather arrestingly spikely and distracting in the way that some mid-late C20th ecclesiastical embroidery can be. I asked about the Minster’s other frontals but no one seemed to know anything and the books available revealed nothing either. Finally, back home, I tracked down the York Minster Broderers and was sent the above photograph of the quilt by Jennifer Solomon, the heads of the Broderers This was the one we were after. How I should love to see it close to. Jennifer told me that the curves and culicues of the design were inspired by patterns found on the Minster floor. Such roots of inspiration suited us very well for there are few design features in our ancient church but we wanted to incorporate those that were there into the design for our altar cover.
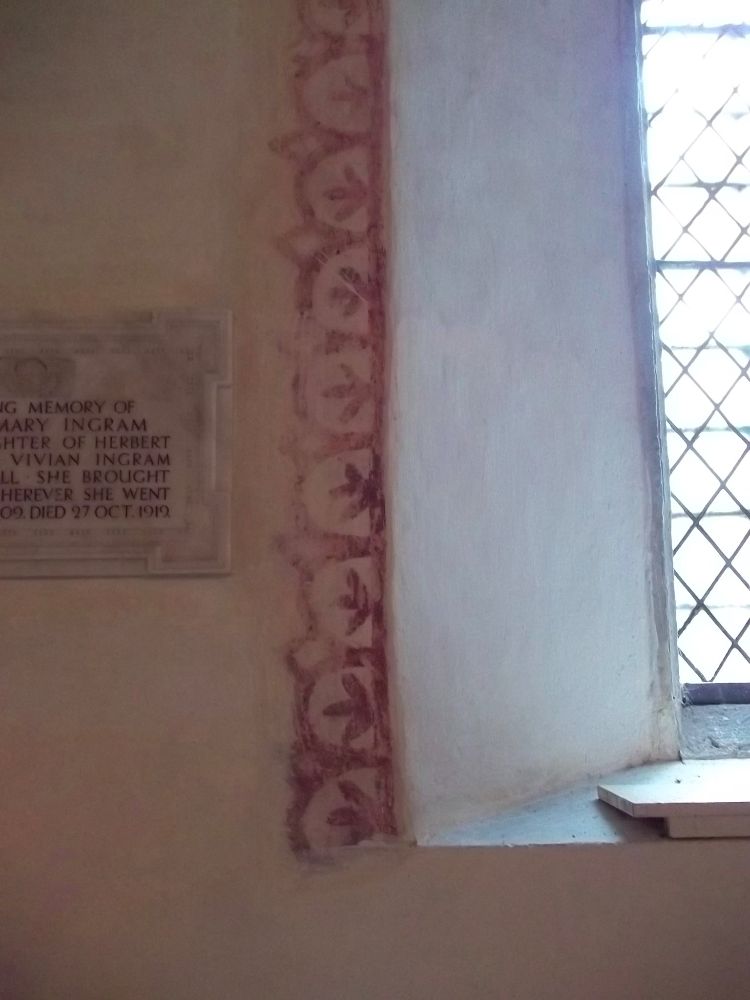
Ipsden Church Oxon. Medieval wall painting: border around window (Fig.4)
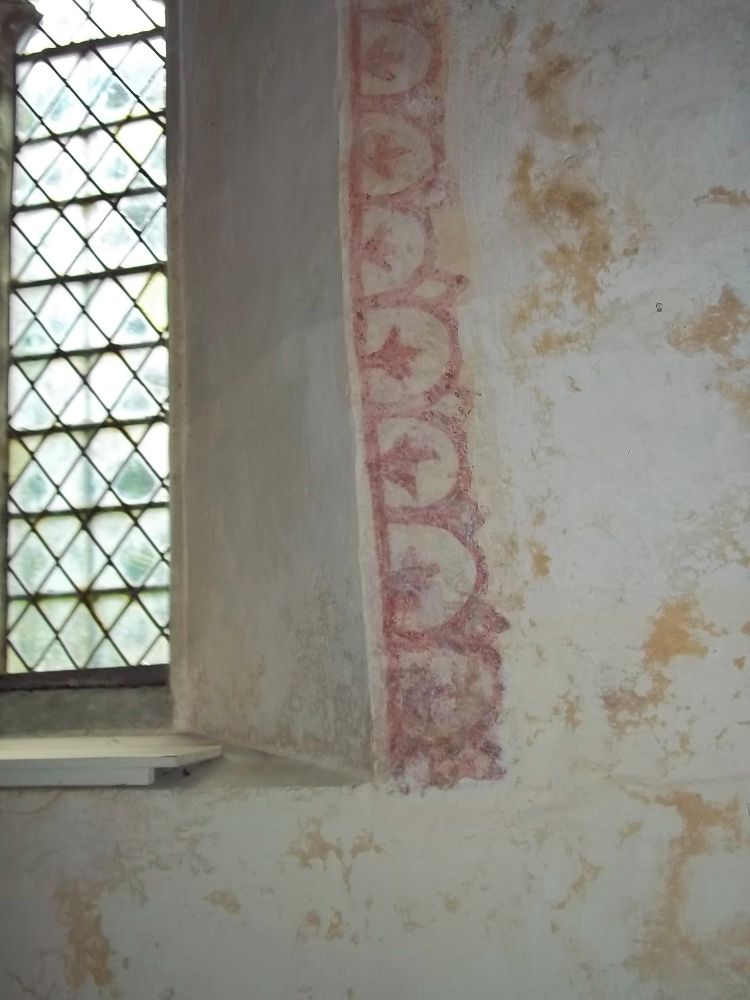
Ipsden Church Oxon. Medieval wall painting: border around window (Fig. 5)
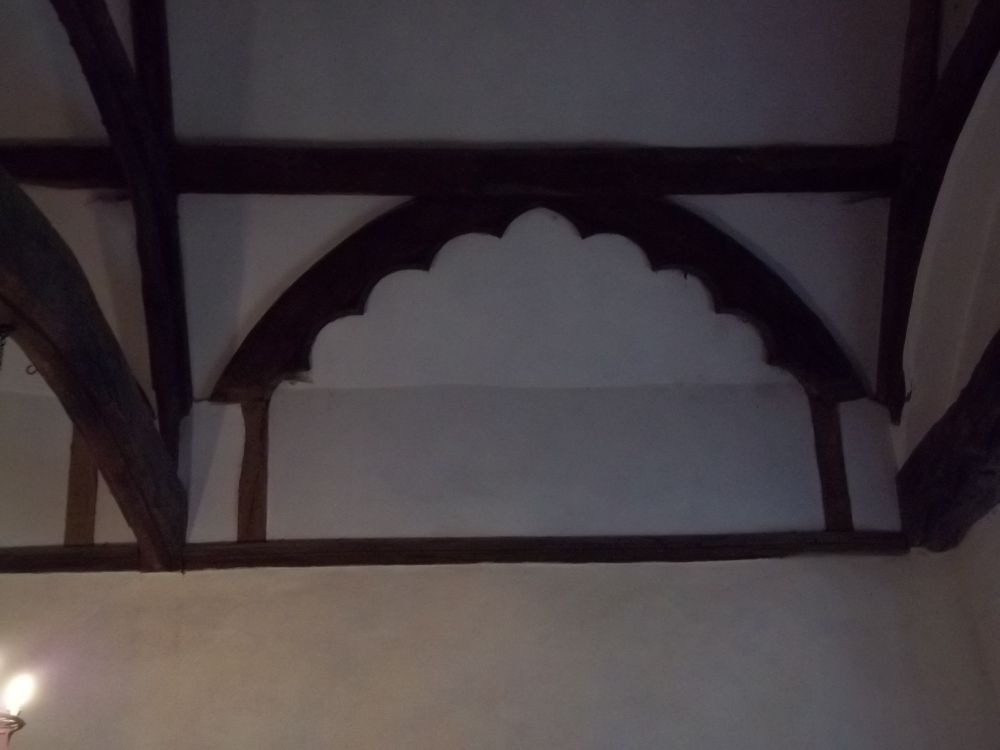
Ipsden Church: Scalloped roof timbers (Fig. 6)
The altar we wanted to make a frontal for stands to one side in what looks like a small barn – we are at a bit of a loss to know what to call it as it isn’t an aisle and it isn’t a transept, The beams there have scalloped edges and around the window behind the small altar is a scalloped border. As the altar stands in front of this window, using the design for a border to link it to the window makes sense. So, I set about playing with ideas, taking inspiration from the York frontal but making sure the sewing is not too complicated or fiddly. Appliqué would have to be limited as it is difficult to do well. Here are a couple of ideas I sketched out. Each design allows for the inclusion of little medallions or squares of different designs but theses we will work out as we go on.
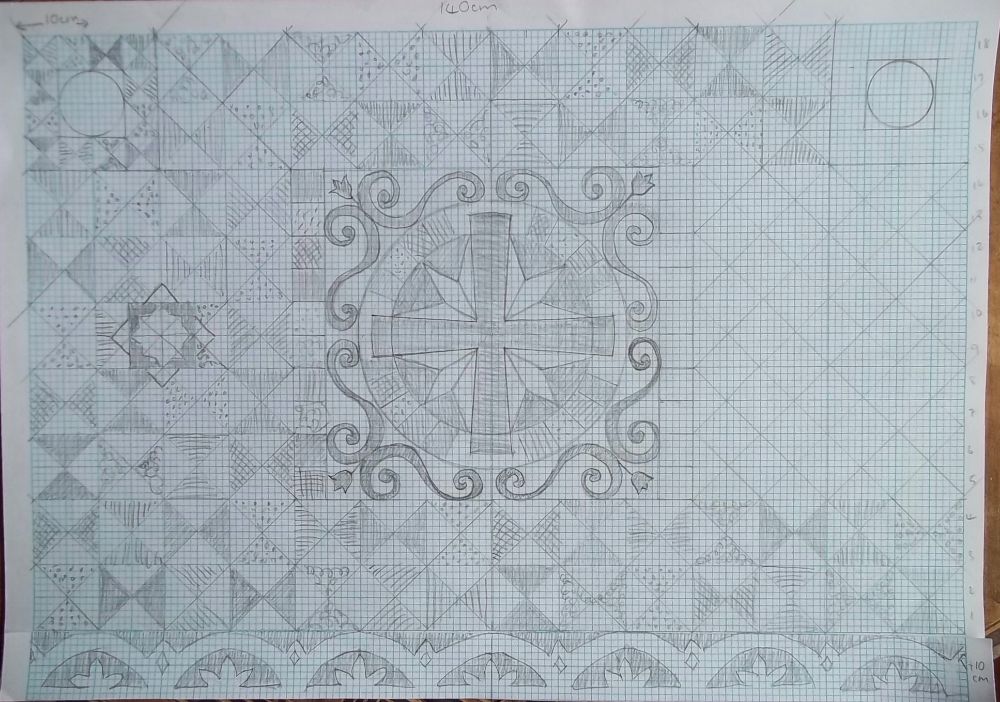
Ipsden Church Oxon. Design 1. for altar frontal (Mary Addison) Fig. 7
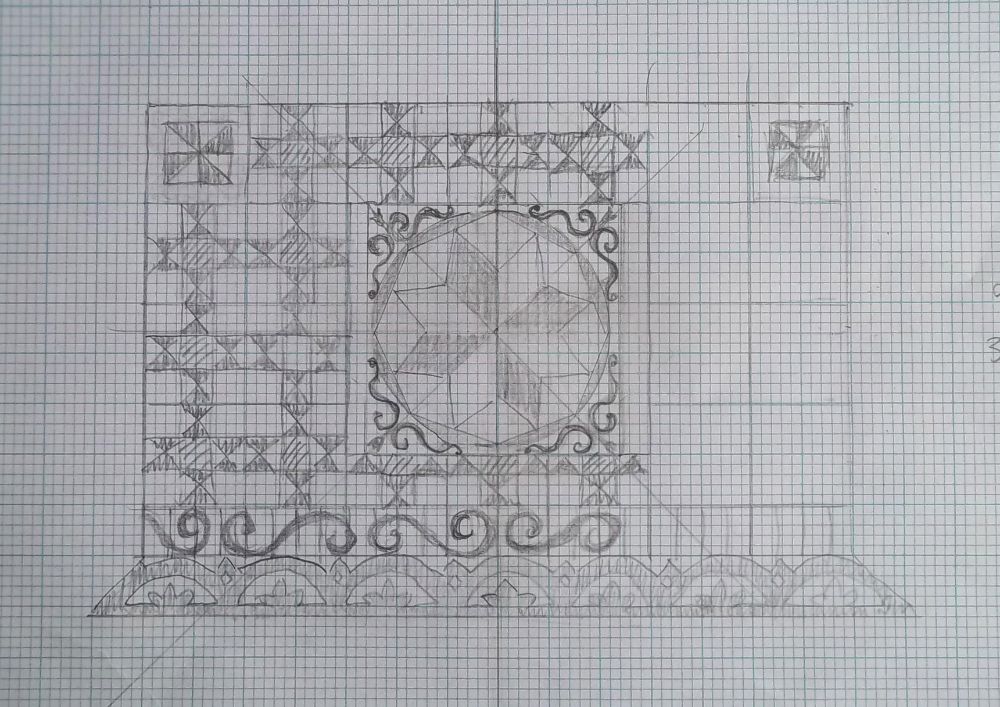
Ipsden Church, Oxon. Design 2. for altar frontal (Mary Addison) Fig. 8
Two weeks ago we had our first meeting of people wishing to take part in our patchwork group. 6 women came along (men are welcome to join in and I canvassed hard to be inclusive but no man was brave enough to take up our challenge – erm invitation) and others expressed an interest but said they were unable to make that day. I showed my sketches and we looked at fabrics. At this point I was thinking of patchwork involving triangles as above. After the meeting I let conversations we had had and ideas mooted mull around in my head for a day or two. This was easy as being back to work full time while we are short staffed meant all I could do was think. But this enforced inability to get on with anything was a good thing and I came to realise we should start off as simply as possible. Accordingly, in the evenings after work I started to cut 5cm squares out of graph paper and tack them up with a sample range of fabrics. In an old Selvedge magazine, an issue devoted to quilting, I came up the quilt pictured below which reinforced in my mind the sort of colours we were after.
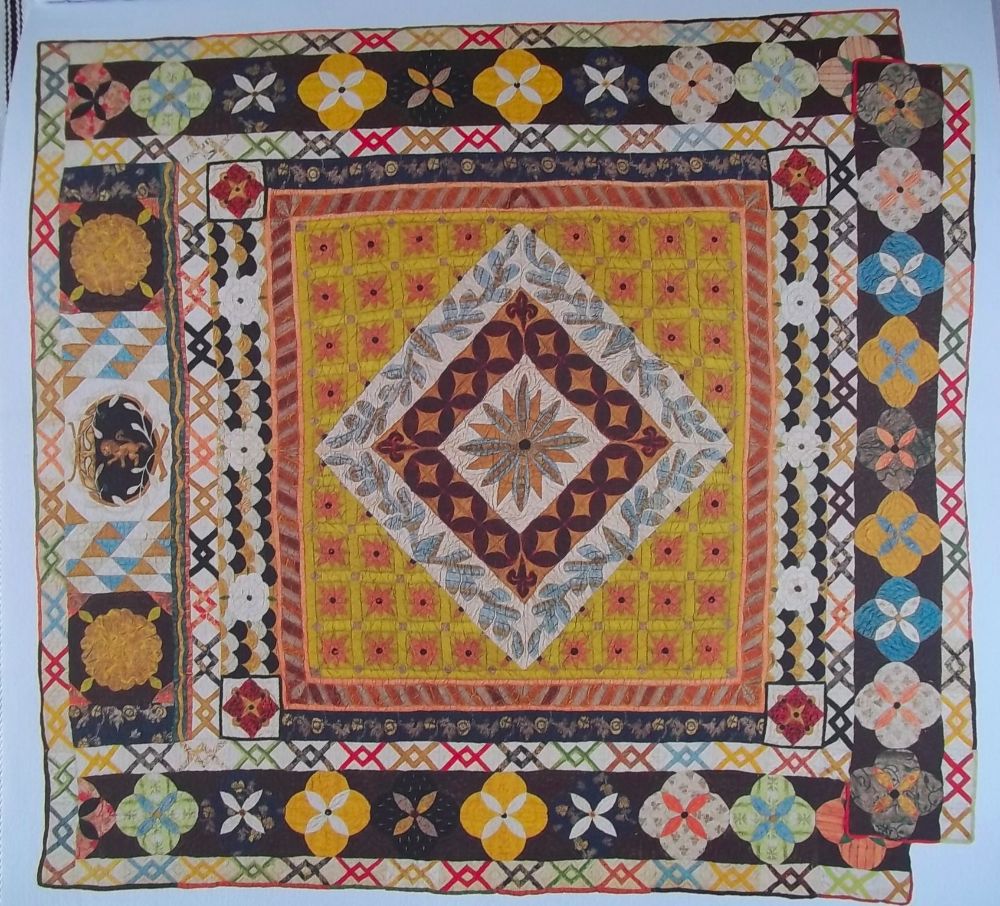
Bishop’s Court Quilt (1690-1720): made in Exeter (now in the V&A Museum but at present in store) Fig 9
We would begin with the part of the quilt which would be the table top. This we would cover with random small squares with shades of yellow predominating. My dining room table was gradually filling up with small squares as every evening I added a few more. Below is what was ready (but not written in marble, the pieces just placed next to each other and not sewn) for our second meeting.
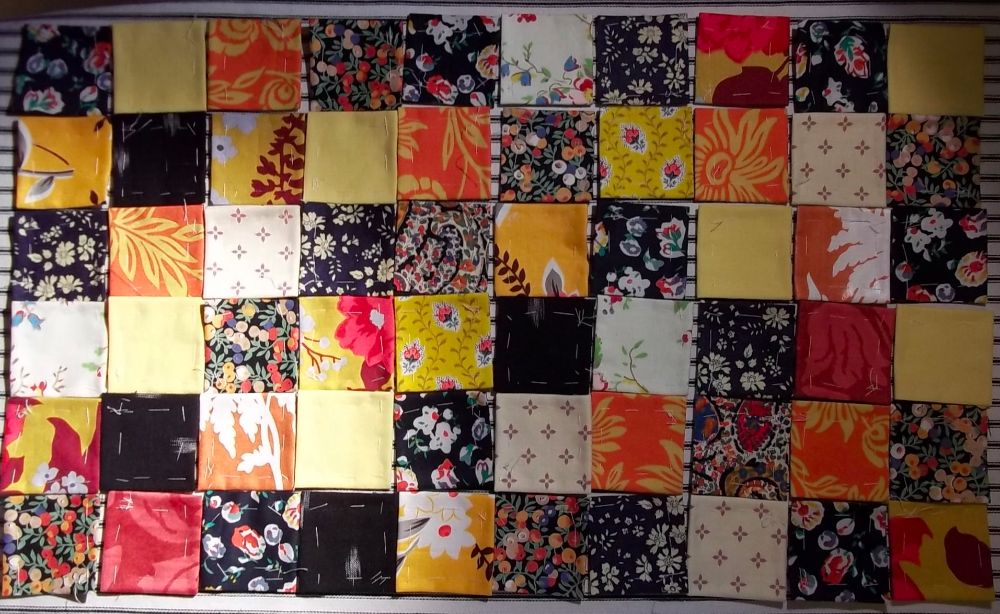
Loose pieces for patchwork, placed not sewn (Fig.10)
Second Patchwork Meeting (The Vicarage Saturday 12 May 4pm)
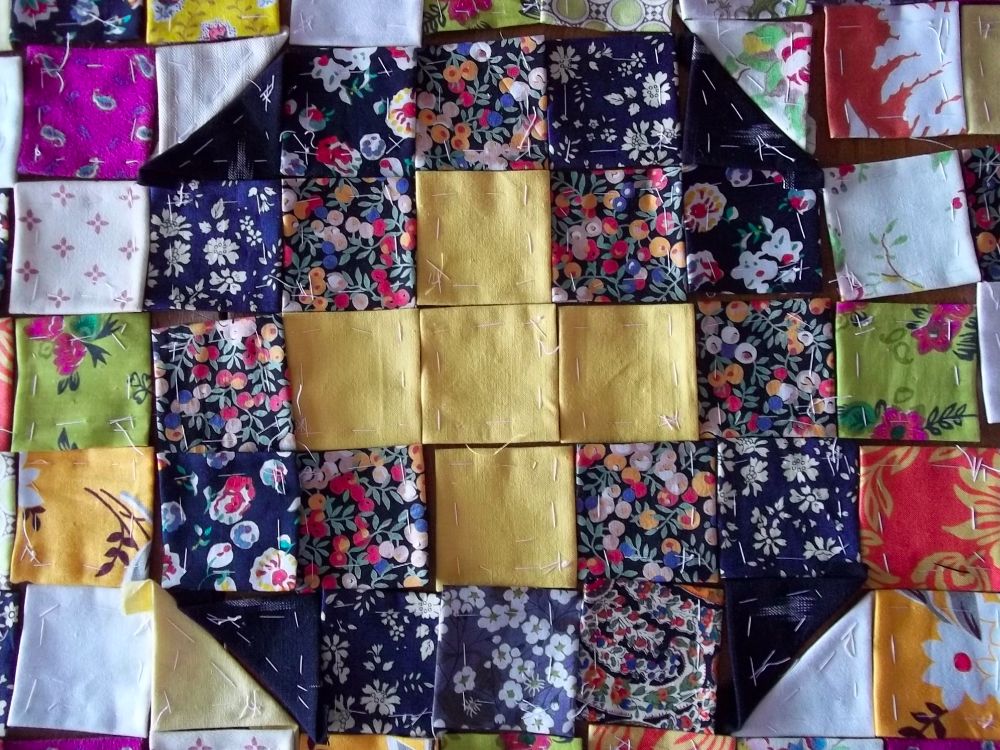
There were 6 of us once more, gaining one person and another being away. I produced graph paper squares and slightly bigger bits of fabrics which I then ‘fed’ to the seamstresses sitting around the table – as production lines go it was very gentle and enjoyable. We set several aspects of the world to right, agreed over which was the best optician in Wallingford and noted the fact of a local attempted burglary. Tea was drunk but the poor lot of biscuits on offer (dead fly biscuits are never really a great lure) were ignored. At the end of 2 hours, the table looked like this (see below). There will be a bigger medallion with cross on the face of the frontal which hangs down but I thought the top needed some more subtle symbol to keep those making it have something centrally to focus on. I had a few triangles which I had prepared for our first meeting and I began to see how useful these would be turning a square into an octagon as I tried them out at the corners of the dark patches surrounding the yellow cross (Fig.11).
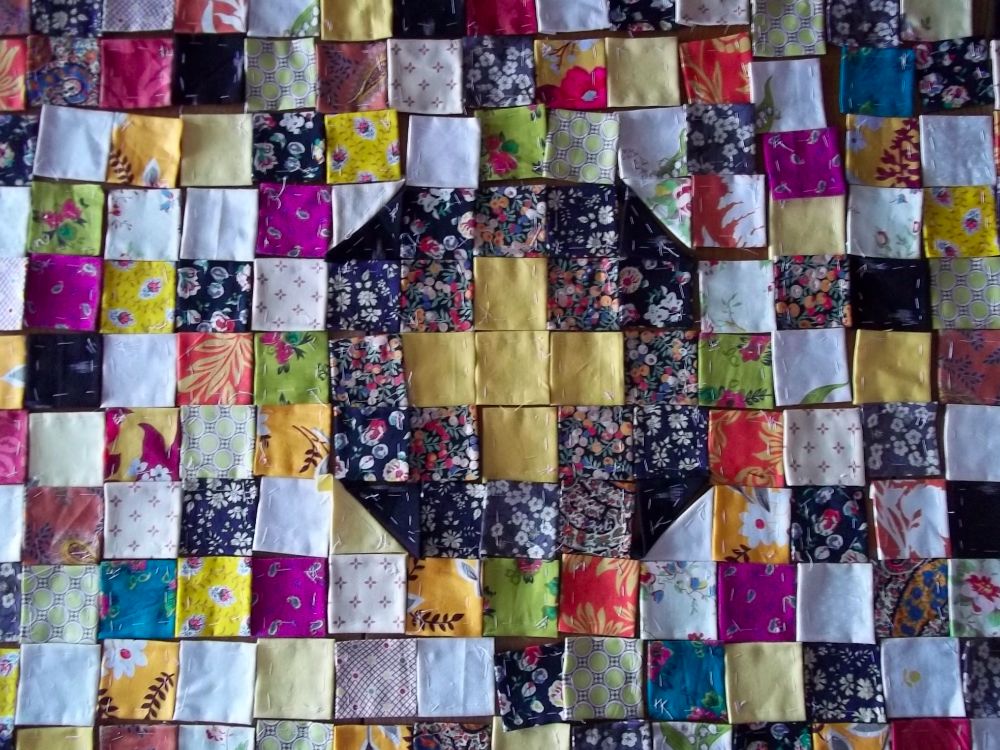
Patchwork: Preparation for top of altar frontal (Fig. 12)
Nothing has been sewn together yet and it has been very useful blogging about the quilt as I can see that I have gone from lots of yellow pieces to too few of them – although Fig. 12 was taken in bright morning sunlight on a table near an easterly facing window, while Fig 11 was taken in artificial light at 11.30 pm. But even so … more yellow, I think.
I am now wondering about the skirt of the frontal being done in diamonds as below but with yellows instead of black outlining the stars. Doing this would be easy for people to handle and each could take away sufficient material and papers for complete stars. Assembly would also be easier. But, as Susan Boyle says, ‘baby steps’, let’s advance a small step at a time.
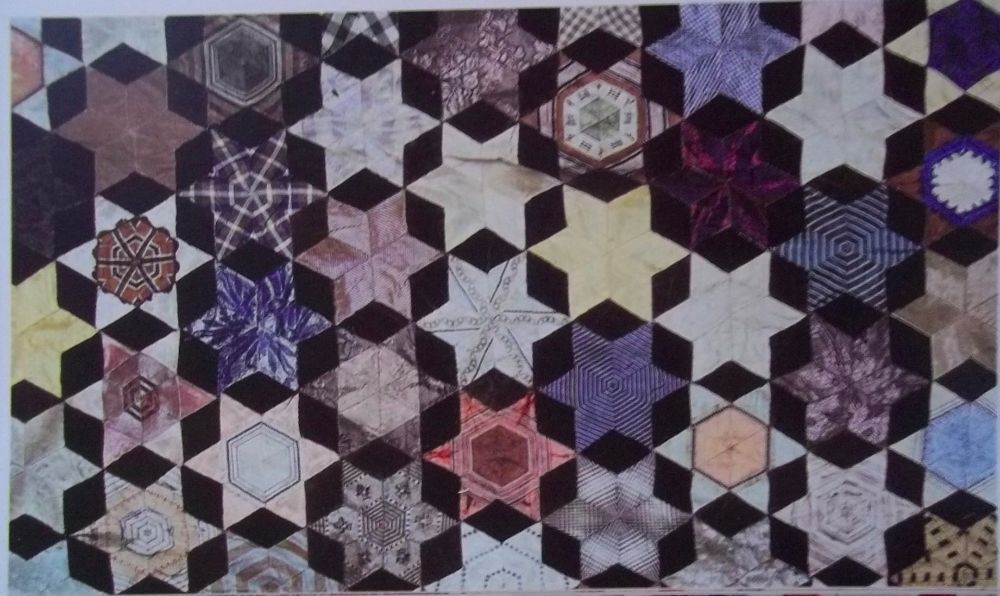
Quilt of 1880-1920 (Quilt Treasures: The Quilters’ Guild Heritage Search. published 1995 by Deirdre McDonald Books, London)