Wedding monogram: white embroidery cotton on white linen. Double monogram of F & M
I finished this monogram just in time for our Art & Craft Exhibition but too late to be taken to the wedding on the 6th of July. I do try to meet deadlines but I am not often successful – now I come to think of it all my 4 children were born round about 2 weeks late – a random thought perhaps but I do sometimes wonder whether it’s a deep seated character trait. (Yes, I make the vicar late for church [well, later than he would wish to be], I’m late out of the house for the bus in the morning, late handing forms in, etc.) But I can be on time for big things like exams, special journeys by plane or train, dinner parties (though not drinks parties), doctors’ and dental appointments and meeting people for lunch. So, perhaps it’s all to do with priorities. Ummm.
As I have a tricky design of wisteria to embroider on a coat that is occupying me, this post will be short. I thought it might be interesting to see how the design for this monogram evolved. I began by settling on the initials and a wreath of roses but I was so carried away by the roses that I didn’t notice how wrong the monogram was – much too fat and clunky.
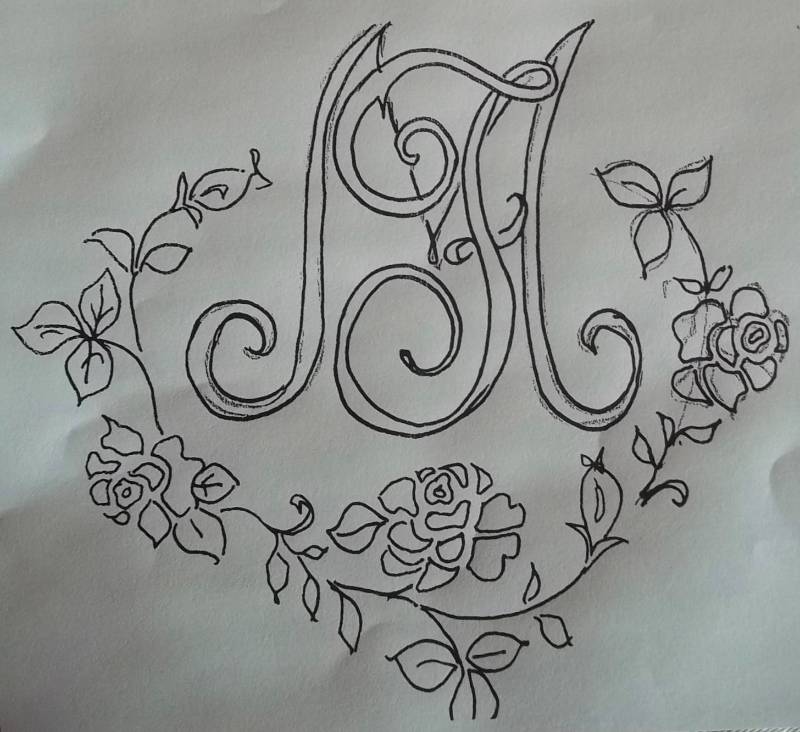
Abandoned design for F & M monogram: too F & M too contrived; wreath of roses ungainly
Dissatisfied but unable to work out what to change, I did the only thing you can do in such circumstances and put it to one side while I got on with something less challenging. Sometime later I came back to it and realised a complete redesign was needed. The letters would be more elegant if squashed up a little and given a bit of a forward slant. Then the curve of the garland would need to be more oval than circular and the roses pruned on ‘less is more’ principle.
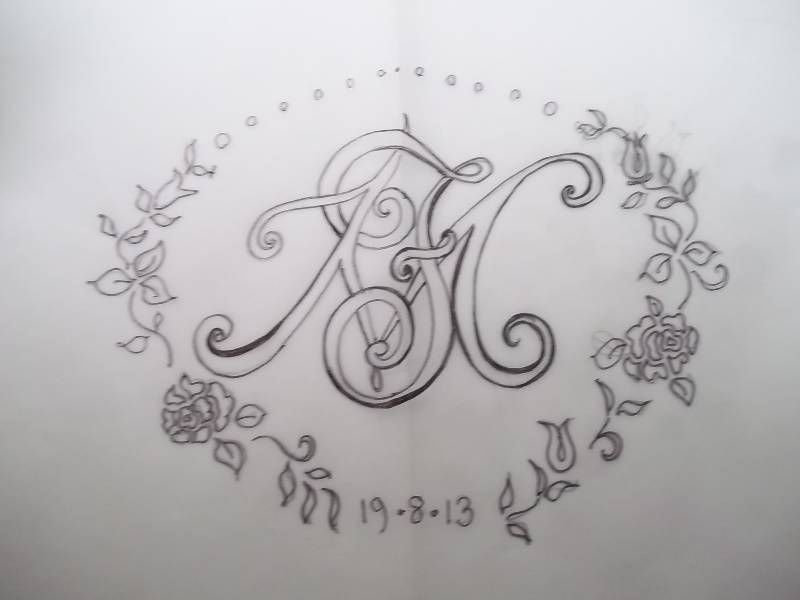
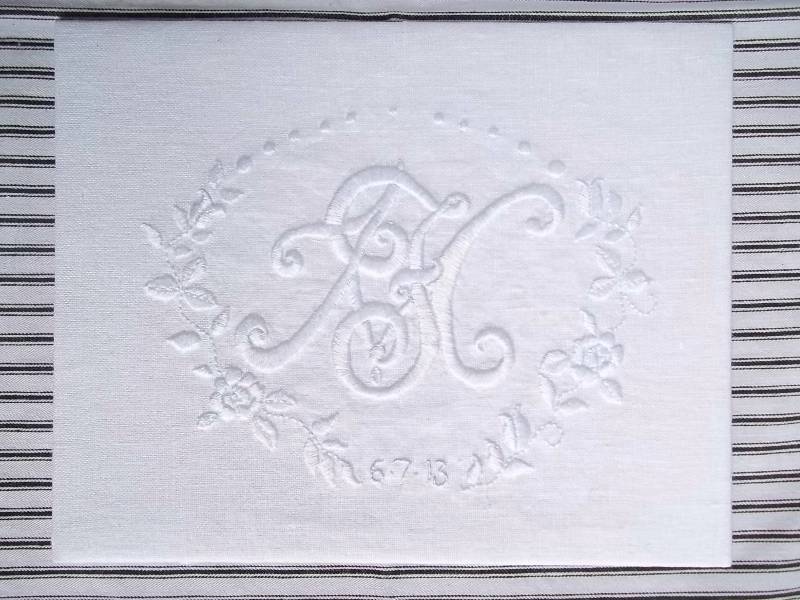
F & M monogram: final design
I transfer the design to linen by placing the inked-in outline (seen above) beneath the piece of linen on a light box. The design is then traced on to the linen with an ordinary pencil (probably whatever type comes to hand, but sharp and not too soft). Next, I tack a piece Vilene Stitch- n-Tear to the back of the linen which stabilises the embroidery, that is it stops the fabric puckering up as you sew, and means that I don’t need to use an embroidery hoop which I don’t like. You can only stab up and down on a hoop. I like putting the needle in and out in a single action. For some things like gold embroidery, a hoop is, however, essential. On a sewing machine I now zig zag the raw edges of the piece of linen which I’ve cut to a size to accommodate the design plus sufficient to fold over the mounting card. Threading up a needle with 2 strands of embroidery cotton, I now pick out the pencil lines of the design with small running stitches and when this is done, I gently wash the fabric to get rid of the pencil marks. When nearly dry I iron this and leave to one side to completely dry.
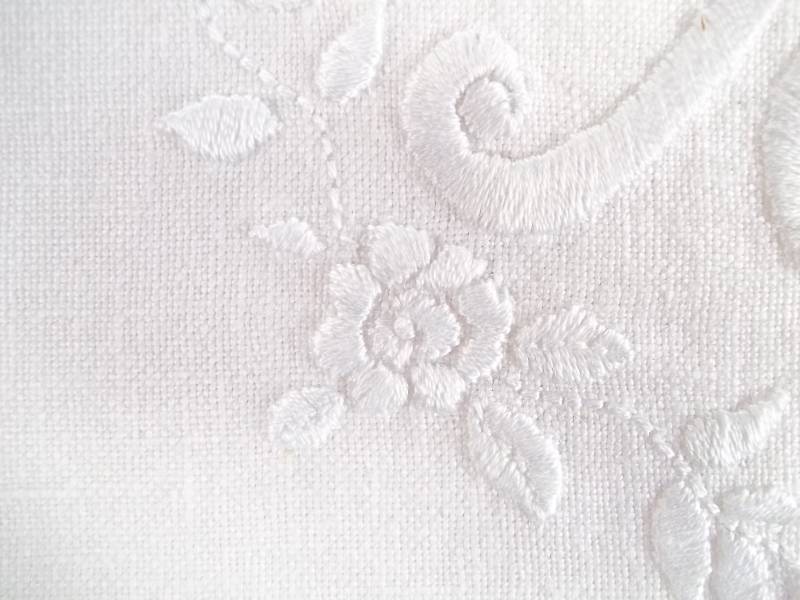
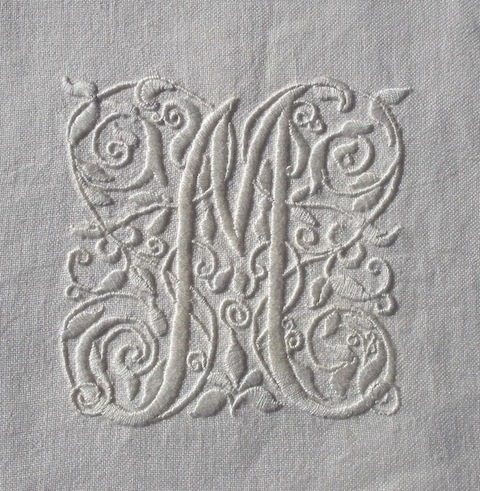
F&M wedding monogram: detail
I now pad out the areas like the letters and the flowers with more running stitch so that the design will have some volume and only then do I get on with satin stitch. As I go, I make little adjustments to the design, often adding a leaf or curly stem here and there. When sewing is finished I aim not to wash it another time but if it is necessary I will do. If the embroidery is on a cushion, another wash won’t hurt as I need to be sure that it will wash well anyway. I don’t sew in conditions comparable to those in which the royal wedding dress was made and anyway think life is as much about black cats on knees as it is about loving embroidery.
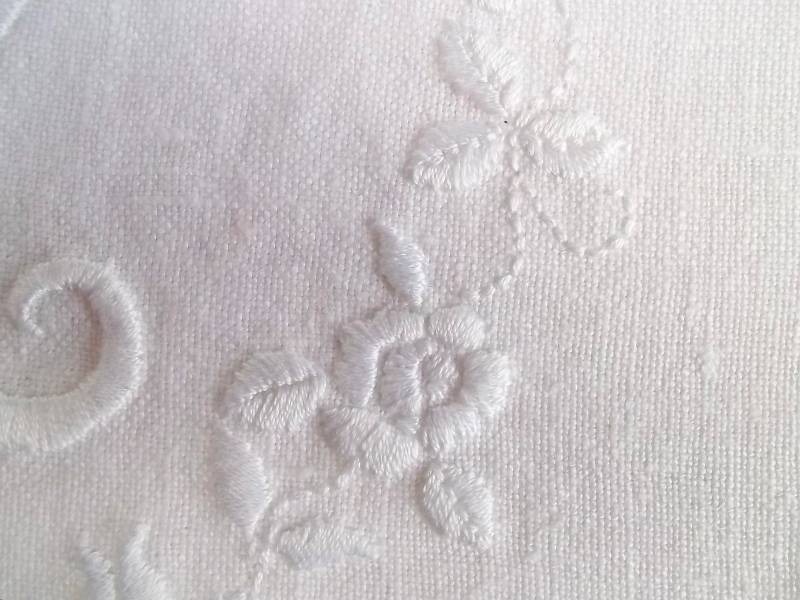
F&M hand embroidered monogram: detail
To maintain the depth of the satin stitch, the finished embroidery is steam pressed face down on to a fluffy towel and then left to dry completely. A box frame in which the embroidery can breath is the best choice. Cut a piece of acid free card just a little smaller than the inside of the frame. Lay the card on to the centre of the embroidery and fold over the edges of the two long sides of the fabric. Now, with a very long thread lace these two edges together, pulling the thread as tight as you can. Repeat this for the two short sides. As you can see from my photograph below, mine is not as tight as it might be as I was rushing to get it done for the exhibition. But it is fine and the front is nice and sufficiently taut. Some people mitre the corners but I have never felt it necessary.
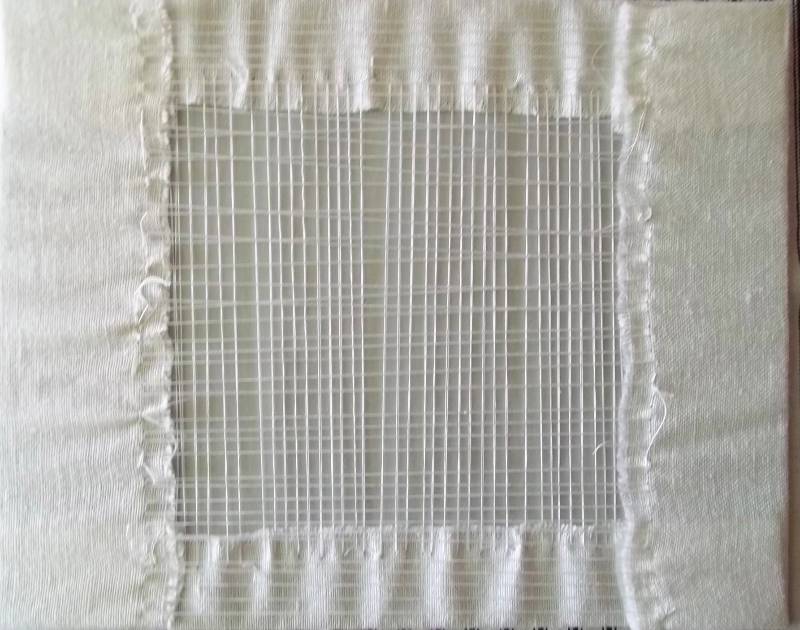
Hand embroidery showing the interlacing of the edges when mounted on acid free card
Photographing white on white is exasperating as no two photos look the same colour reflecting small changes in sun through clouds, etc. Today, this is the best I can do. Now back to embroidering white wisteria on to a blue coat.

Wedding monogram: F&M hand embroidered with roses on linen
One Trackback
[…] still like the white on white (see here, here and here)best but daughter No 1 kept suggesting coloured initials – at first blue was the […]