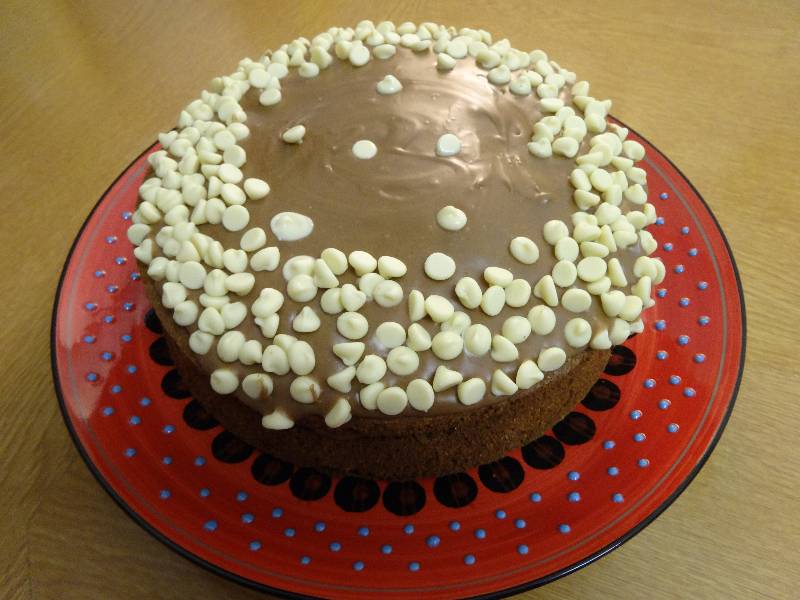
Ovaltine cake with Ovaltine fudge icing
It was my turn to make a work birthday cake – this time for the Archivist’s birthday. I had in mind my foolproof standby recipe for a chocolate cake which I have regularly churned out for birthdays since my children were little but I joked as I left the library that it would probably end up being an Ovaltine cake as I couldn’t remember when last I used drinking chocolate (I knew we had Ovaltine as daughter No 1 had appeared with a giant jar the week before). There was indeed no drinking chocolate but thank goodness there was a small tin of evaporated milk because that is the real key to success with this lovely light cake with the very best of fudge icings. (When I make this again I shall try the addition of coffee to the cake mixture but leave the icing exactly as before.)
Ovaltine cake with ovaltine fudge icing
Ovaltine Cake: ingredients
200 g/7 oz self raising flour
200 g/7 oz caster sugar
4 tablespoons Ovaltine
100 g/4 oz butter
3 eggs
5 tablespoons evaporated milk
5 tablespoons water
1 teasp. vanilla extract
Grease 2 deep 18 cm/7 inch cake tins (not loose bottomed, I have a couple of sandwich tins with little metal arms that enable you to loosen the cake from the bottom and the sides of the tin).
Sift the dry ingredients into a big bowl and rub in the butter.
Mix together the eggs, milk, water and vanilla essence and stir this into the dry ingredients.
Mix well until you have a soft mixture.
Bake in a preheated oven (180 degrees C/ 160 degrees C if a fan oven/350 degrees F/ Gas Mark 4) for about 30 minutes (until a skewer – my mother always used a hatpin – comes out clean).
Ovaltine Fudge Icing
75 g/ 3 0z butter
4 tablespoons Ovaltine
225 g/ 8 oz sieved icing sugar
3 tablespoons evaporated milk
1 teasp. vanilla extract
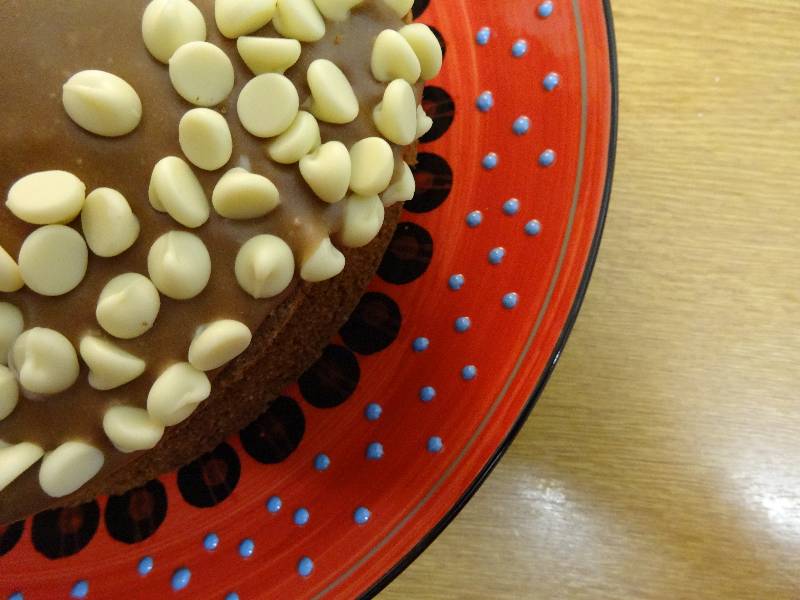
Melt the butter with the Ovaltine, then stir in the icing sugar, evaporated milk and vanilla extract. Beat well until smooth. This makes enough to spread between the 2 cakes and to generously cover the top of the cake. It is easy to handle, not too runny, and firms up completely in a few hours so that it can easily be transported in a cake tin and come out at the other end looking every bit as beautiful as when it went in. I added white chocolate drops just because I had some.
4 Comments
I love the thought of a hat pin cake tester! The cake looks beautiful, and the cake plate at least as lovely.
The hat pin was a great idea – my skewer leaves a great big hole. Alas, the hat pins have long disappeared. The plate is fun when white feels a bit bland.
Yum!
It is and the milk chocolate version which I’ll blog about soon is just as good (and smoe think even better).
One Trackback
[…] when fitting cake making into an evening after work (and icing until after Newsnight). The Ovaltine cake was a variant on this […]